2020. 2. 23. 07:21ㆍ카테고리 없음

PARTS onearduinoVariousjumper wiresTenLight Emitting DiodesTenResistorsOnePotentiometerOneLight Dependant ResistorThe Arduino is an UNO, the LED's are low values and the Pot is one I had laying around.The LDR is one salvaged from my Cybot which was modified in a previous guide seeI found a good site for calculating the values for resistors - see the first picture on this guide, the link to which is just below here. If you follow the pictures above you will be able to replicate this layout.The Resistors are in place to stop power surge from damaging the Light Emiting Diodes, The Potentiometer is used to adjust the rate of the LEDs change from Off to On.
This is important as depending upon how strong the light will get you can flood the LDR resulting in the LEDS cycling so fast that the appear to be on all the time.This means that nay data sent to Excel would the changing so quickly and the size of the change so small as to be worthless in terms of interpretation. So in essence the POT is used to calibrate the data rate to excel. When I carried out the initial testing the LDR worked well by itself, but I found that the chart produced in excel was very noisy - this was due to too much light getting to the sensor - it was picking up not only the light being measured but also the ambient light in the room.The solution was to place the LDR in a tube, I also mounted it on a little base. This shielded the sensor from the light in the room and made it more directional.Now that you have it all put together its time to have a play - I have only set up two experiments for this setup as follows. For this I enlisted my son as he has one of those SPY kids laser light alarms sets and at eight years old he thought it would be impressive to do.Together we set up the laser and bounced it down the corridor using the set mirrors that came with the toy,The only bit we did not use was the toys alarm pickup replacing this with the Arduino Sensor.Because of the shield around the LDR we where able to ensure that the laser hit the surface of the sensor.
This time I think the white tube helped as it it reflected some of the beam inside and made it easier to get the most light onto the LDR as possible. The hope was that as someone broke the beam we would be able to:.
Firstly tell that the beam had been broken, and. Secondly see if we could tell how long it had been broken for.My Daughter had a friend around so we made it a game in two parts.Game 1 - Avoidance (Image: Trip Wire Game Test 1)The first was to see if they could move up the corridor without breaking the beam:. You can see on the chart that person 1 was the most hesitant going though the beams from the length of time between reading changes, but got quicker as she moved along. (this was My daughters friend). My daughter took the longest time getting through and seems to take the least time breaking the beams when she did.

Arduino Serial Output To Excel Converter
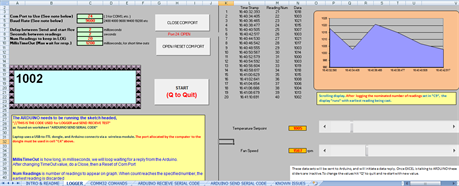
I know Ive used Excel for my collection and initial charting and if that's all you want to do then fine stop there. But if you want to share your data or just generate a chart then what I originally thought would be a convoluted tool Plotly has turned out to be incredibly simple and user friendly.You do need to sign up for an account at but its free and you get a small amount of storage. To create your charts all you need do is select new grid and upload your data.For the data in this guide the excel files have macros in which seems to make the upload take a while (but it does get there (walk away and get a coffee).
Arduino Serial Data To Excel
A quicker way is the save the data to a CSV file without the extras and the upload that. From there simply select the type of chart you want and set the X/Y scales Plotly does the rest see the images in this section and compare them to the excel versions earlier.Thank you for reading this instructable If you enjoyed it or found it helpfull please take the time to vote in the competitions.and if you would like to see more then please take a look at my other guidesoror at my web site at.